When an idea comes into my head I just want to get the waxes out, support and decide which tools I am going to use. Once I am nearly at the completion stage I wish that I had taken some pictures to demonstrate the process of how one of my paintings become the finished product. Always, too late so I was determined to remember this time! Some of you may remember this post from my other blog which will gradually be 'run down' since I find blogger more user friendly!
To continue, with this in mind I have used my latest encaustic and remembered, just, to take pictures along the way.
Step one was to take a blank, white canvas that had been triple primed with gesso and to decide whether I would use it landscape or portrait. For this exercise I decided on portrait style.
I wanted to paint a flower using my iron, hairdryer, stylus and tissues.
The top of the painting would need a yellow background. Next I wanted some depth of colour. To do this I used a hot iron, tipped it up with the point heading for the canvas and melted some wax on it so that splodges of wax would fall in dots overall. Now to heat up the hairdryer and blow on those spots so that they would blend and I also used some tissue to blend even further. 
Each layer of spots would be blown and pushed around with some tissue until I got the effect I was looking for.
Bit by bit more depth is achieved by adding darker colours on top of previously lighter ones.

In this third picture you can see the different coloured layers producing different effects.
Now the time has come to heat up my mini iron. This is inserted into the stylus which can heat up different sized tools to create different effects.
As you can see I have started to paint an idea of a flower using the mini iron. The painting continues to evolve although I am not totally certain of the final direction the waxes will take me!
At first I thought of a poppy flower and here is where you will see the dilemma I have put myself in..... should I continue or just stop! There is always the time to decided to walk away from the painting or to add just that little bit more. If I were doing this on support card I could just redo the whole thing and start again. However, painting with wax on canvas is a little more permanent.
Well, I just couldn't resist it! I went that bit further and now have changed the whole structure of the flower. I stopped using the mini iron for a while and started with the hairdryer again.

The shape of the flower was beginning to evolve but it needed some finer work to be done on it. Now, I really had to be careful not to overdo it so that it would be completely spoiled.
I added, using the nib of the hot stylus, some stamens and detail for the centre of the flower. It was very nearly finished. Again, I carefully heated the centre to try and soften the look.
Here we are!!! TADA!!!!
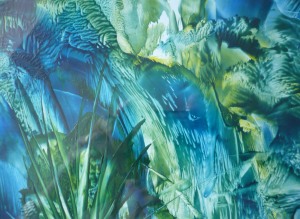
 The completed painting! What do you think? I find the ragged edging to the flower helps make it more interesting.
So, you see, you never really know where you will go with encaustic art. The waxes decide the final outcome for you and to try and go against the flow just will not work. Believe me, I have tried!!


